Clearing Staple Jams (For Staple Finisher-R1)
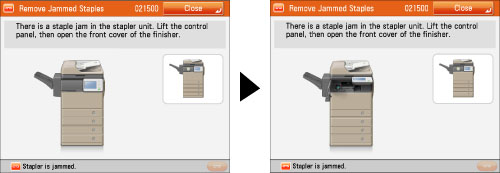
If a staple jam occurs, a screen indicating the location of the staple jam and how to clear the jam appears on the touch panel display. Follow the instructions on the screen to clear the staple jam. The screen is displayed repeatedly until the staple jam is cleared. If you press [Close], you can continue operations, such as setting modes or scanning originals, even if the jammed staple is not removed immediately.
Check the location of the staple jam, and follow the procedure described below, while referring to the directions that appear on the touch panel display, to remove the jammed staple.
|
IMPORTANT
|
|
Make sure to close all covers and paper drawers of the machine before clearing any staple jams.
|
|
NOTE
|
|
The Staple Finisher-R1 is an optional product.
|
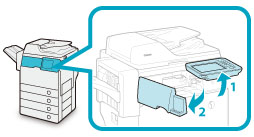
1.
Pull out the staple case.
|
|
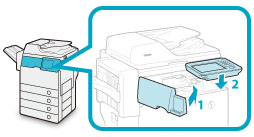
1. Lift the control panel. |
2. Open the front cover of the finisher. |
|
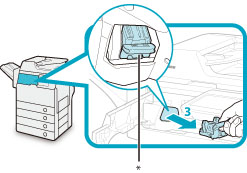
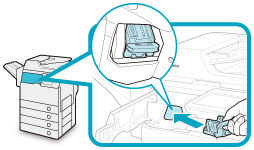
* Staple Case
|
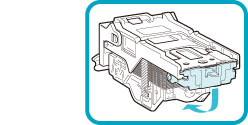
3. Grasp the staple case by the green tab to pull it out from the stapler unit. |
2.
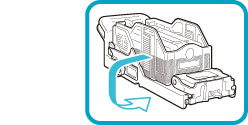
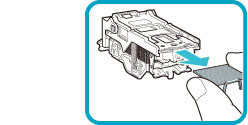
Turn the staple case upside down and lower the metal part on the front side of the case.
 CAUTION |
|
When lowering the metal part of the staple case, be careful not to cut your fingers on the staples.
|
3.
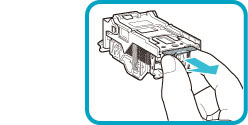
Slide and remove the full row of jammed staples remaining in the slot.
4.
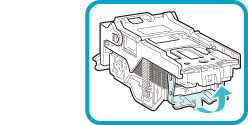
Return the metal part of the staple case to its original position.
Make sure that the metal part clicks into place.
5.
Return the staple case to its original position in the stapler unit.
Make sure that the staple case clicks into place.
6.
Close the front cover of the finisher, and then lower the control panel back in place.
|
|
1. Close the front cover of the finisher. |
2. Lower the control panel back in place. |
CAUTION |
|
When closing the cover, be careful not to get your fingers caught, as this may result in personal injury.
|
|
IMPORTANT
|
|
As soon as the cover is closed, the stapler unit automatically conducts several dry fires to reposition the staples.
|